Best Microblading in Puerto Vallarta
- Bre Patterson

- Oct 27, 2021
- 3 min read
Last year I spent several months in Puerto Vallarta, Mexico and really found my groove. It became a home for me instead of just a vacation destination. I made friends with several locals and started to ask around about microblading professionals. From my friend referrals and the trusty Facebook group: Puerto Vallarta ❤️ Everything You Need Or Want To know -Information Zone 🇲🇽, I discovered Monica and her team at Clínica "Realza tu belleza" came with raving reviews for the Best Microblading in Puerto Vallarta. One of the top noted and most important things is that Monica and her team are all licensed and have sterile equipment. She had the most loyal customers and best reviews, so I booked an appointment via WhatsApp. I planned to have my eyeliner tattooed and my eyebrows microbladed and microshaded.
Upon arrival, I rang the doorbell and entered the waiting room. I was quickly greeted by Ferdinanda who brought me to my chair. She explained she would be my professional technician for microblading prep and that Monica would be doing the microblading and microshading.
Primary Numbing:
The first step was to apply the anesthetic numbing cream and wait about 20-35 minutes.

I describe the numbing process like a light sunburn feeling at first and then it goes away. This will make you not feel the slicing and shading. Instead you will feel pressure.
The plastic over the numbing cream is to absorbed into the skin. I say it helps heat up the cream to speed the numbing process.
Brow Mapping, aka Measuring:
Before the Clínica "Realza tu belleza" team begins microblading, they do a very precise job at brow mapping by measuring using chalk and string. For my sister and my eyebrows they moved my gap between the two brows closer; for my mom, they lifted her eyebrows up since she has more wrinkling due to beautifully aging. My mom was terrified (as you hear in the video) because she wasn't 100% sure about doing this in the first place. Spoiler Alert: She wants to go back and do her lips next. She LOVES her microblading.
Monica then fills in the eyebrows with an eyebrow pencil to showcase how the eyebrows will be shaped and placed. She will make sure you approve of this before moving forward.

First Pass of Microblading/Strokes and Shading:
This is the easy step! The anesthetic numbing cream is removed and Ferdinanda prepares the blade. She showed me it was sterilized and the new blade was still in its sterilized packaging. Monica then performed the slits (think of the sound of tearing paper) or more properly called strokes. She is carefully stroking the skin to create fake hair lines on the first pass.
During this process is where you feel the pressure and most likely won't feel the cutting from the strokes. Everyone's pain tolerance is different but for my mom, sister and I we had relatively painless experiences.
Secondary Numbing:
The secondary numbing only sits for 1-2 minutes and since the skin is already cut open, it absorbs the numbing mask quicker. This also helps reduce or even stop blotting (little blood on the surface).
Second Pass of Microblading, shading and pigment mask:
More slits are created and adding of more pigment mask.
In this time-lapse video of my microblading, my eyelids were already tattooed so it looks as if I was crying. I can assure you, I was not. It is the ink smeared from the process. You will notice Monica performing the second pass on the right eyebrow and Ferdinanda shading in the left and preparing that eyebrow for the second pass. (P.S. my mask is below my nose because they needed to move it during the process)

Healing:
The ladies cleaned up all the excess pigment mask and used a red light therapy want to stimulate my cells. This promotes quicker healing of the skin. This is a step I highly recommend you make sure it is included in your microblading if you go somewhere other than Clínica "Realza tu belleza".
They sent me home with a version of Neosporin or Aquaphor to continue applying for another week. This helps with the itching, dryness, and overall healing.
A huge thank you to Monica, Ferdinanda and team. I love all the compliments I receive and I am still a happy customer a year later! The best microblading and microshading in Puerto Vallarta is at Clínica "Realza tu belleza". PLEASE SAY BRE (OR THIS BLOG POST) SENT YOU so Monica knows how you found her. She always asks how her clients discovered her.
Before vs. After:
All of these photos are without makeup.
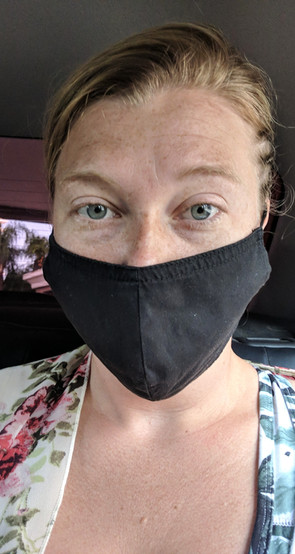
On my way to microblading (in my uber).
The day after microblading and permanent makeup. My eyelids are puffy from the procedure but do not bother me.
My sister and I. I was 6 months post microblading, her eyebrows are 3 months post microblading.
9 months post for me, 6 months post for my sister.
1 year post microblading and everything looks amazing still.


Comments